"The effect of a crisp highly-starched muslin dress upon a man of quick emotions is rapid and startling. The first impulse is to crush it between the arms, and crumple it up like a silverpaper balloon; but such desires cannot be indulged without the excuse of an affectionate embrace sanctioned by the parents of the young lady.Is it not beautiful to gaze on the female form, clouded in fluttering gauze, and floating over the ground white and aerial as a puff of steam? Through the transparent skirt the embroidered petticoat displays its costly work, and the machinery of the little feet may be watched as under a glass-case, with increasing interest. The shoulders are seen through the slight haze of the bodice, and they are delicately fair."
Augustus Mayhew, Faces for Fortunes, 1865
More years ago than I care to admit, I attended my first "Ladies of the 1860's" conference; Carolann Schmitt was speaking on petticoats and she kept saying, "when properly starched..."
I timidly raised my hand and asked if she meant spray starch.

She smiled kindly upon my poor ignorant self and gave a brief explanation of the proper method, here's another example from a period reference,
An encyclopædia of domestic economy by Thomas Webster and Mrs. William Parkes published in 1852.
STARCHING.
6493. As it is necessary to have certain parts of linen and various articles of dress less pliable than usual, starch is employed to give the requisite stiffness. The chemical nature of starch, and the process of manufacturing it, have been already explained.
6494. To make the starch for use it must be mixed with a sufficient quantity of cold water, until it is about the consistence of common paste, carefully breaking all the lumps, and rubbing it with a wooden spoon till it is quite smooth: then add boiling water in the proportion of a pint of water to an ounce of starch ; put the blue flannel bag into it, and let enough colour be dissolved to give the required tint. The making of starch properly requires some care. If made in a tin saucepan, it is a chance if it does not burn, like all thick liquids. The best vessels for making it in are a bell-metal skillet, or a copper vessel, tinned, or an earthenware pipkin. It is said that an iron vessel would make it turn black; but this is impossible if the iron is tinned: a small cast-iron saucepan, tinned inside, will answer very well.
The starch being properly mixed, put it on the fire and let it boil, taking care to stir it all the while, to prevent burning. When it is taken off the fire and poured out, cover it with a plate, to prevent a skin forming. If it be wanted stiffer than common, a little gum Arabic or isinglass dissolved may be added: and for some articles of lawn, gum Arabic alone is used, without starch. Some add a bit of white wax.
C495. As an economical kind of starch, for articles where no nicety is required, some use common paste made of wheat flour.
6496. The parts of linen and other articles of wearing apparel that require to be starched are too well known to demand enumeration, and even these vary somewhat with fashion; the process of starching consists merely in dipping the part into the starch, and squeezing it.
6497. What is called clear starching is the starching of laces, muslins, and other transparent tissues, which requires to be done with peculiar care; for these the starch is made thicker and hotter than ordinary, and the articles, after having been well washed, rinsed, and dried, are dipped into the thick starch previously strained, before it is quite cold. After squeezing them out they are clapped between the hands, to produce clearness. Instead of clapping, which is apt to injure lace, some prefer, after starching and squeezing out, spreading them on a linen cloth, rolling them up in it, and letting them lie for an hour, when they will be ready for the irons. Muslins and cambrics do not require the starch so thick as net or lace. If the articles are too dry for the iron, they may be damped again, by rolling them in a damp cloth; but this should, if possible, be avoided. All linen, after starching, requires to be made nearly, though not quite, dry before ironing.
6498. It is sometimes found that starched laces and muslins stick to the iron, and several methods of preventing this are employed. Some recommend drying the things first, then dipping them in the starch before it is quite cold; then dipping them in cold water and drying them again; once more dipping them in cold water, spreading them on a dry cloth, and rolling up previous to ironing: by this process sticking to the iron is prevented. Some put a little tallow, hogs' lard, or olive oil in the starch; but a lump of refined sugar is preferable. In India all muslins are stiffened with rice water, which is said to be excellent; and the rice starch is said not to stick to the irons.
Commercially made laundry starch was readily available, but many receipts were published for those who wished to make their own - potatoes were frequently used as a starting point.
Laundry starch powder is still available for purchase, sometimes it takes a bit of searching to find. It's far less expensive than the common liquid starch and can be made heavy, medium or light.

I start with 1/2 cup of starch and add 1 cup of
cold water:

Mix well and add eight additional cups of cold water. Bring to a boil and allow to boil for one minute. Allow it to cool enough to handle.

You now have heavy starch. I now dip my clean dry petticoats in and saturate them.


After squeezing out the excess starch, they need to be hung to dry - outside is preferable, but the over the tub works better in the winter.

The remaining starch can then be diluted and used for collars, cuffs, shirt fronts, etc.
The petticoats will be
very stiff when dry, in fact they can stand up by themselves, but they're wrinkled.


My next step is to spritz the petticoat until damp, but not saturated.

I then roll it up, pop it in a plastic bag and it goes in the refrigerator for at least a day - no, this isn't a period practice, but it allows the moisture to equalize within the garment making it easier to iron. My electric washing machine and iron aren't period either.
I use as hot an iron as possible and apply a lot of pressure - the result is a smooth, crisp petticoat with just a bit of gloss to the surface and it will once again stand up by itself!

Starching is a lot of work, but it's worth it for the period "poof" it gives as well as the protection against soiling - by saturating the fabric with starch, it's difficult for dirt to penetrate, it can often just be brushed off easily.
Give up the spray starch, the real thing is so worthwhile!



 "Night Garden" is my submission for the February challenge at the
  Sargent is one of my favorite artists and this is a phenomenal painting - the ethereal lighting, the beautiful children framed by a garden just slightly running wild.

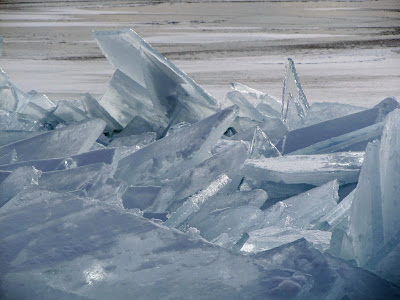


 So why was I down on the shore, gingerly picking my way through the ice rubble? (And just where does the water start exactly?)


 This piece uses size 15/0 seed beads; the pattern is 91 beads across. I decided to go with a modern interpretation, a period look would have a solid background and a very stylized look to the trillium.
 Loom work is really meant to be viewed from a distance, for instance on a bag, not up close - the colors blend at a distance, up close you tend to focus on each individual bead. It takes strong contrasts for the pattern to work.
 I'm excited about this project, but I'm hoping I don't get too bored with the same image - time will tell!
 Grey dull days can be a challenge, especially several in a row - so I've done a little experimentation with vignettes that have meaning:


 But this is the shot I'm most proud of - just a bit of water vapor frozen in place. But look again, at the garden of "Frost Flowers", it would have been so easy to walk right by them if not for this project.
